Imagery by Kathleen Moore
Clouds can add depth, atmosphere, and drama to your paintings. Mastering the art of painting clouds might seem challenging, but with the right techniques and practice, you can achieve stunning results. In this step-by-step guide, we'll walk you through the process of painting realistic and dynamic clouds using oil paints so you can take your artwork to new heights!
Materials You'll Need:
• Gesso primer• Oil paints in various shades of white, gray, and blue
• Oil medium (optional)
• Paintbrushes of different sizes (flat and round brushes work well)
• Canvas or thick paper
• Palette for mixing colors
• Mineral spirits for thinning paint
• Paper towels or cloth for wiping brushes
Step 1: Prepare Your Canvas
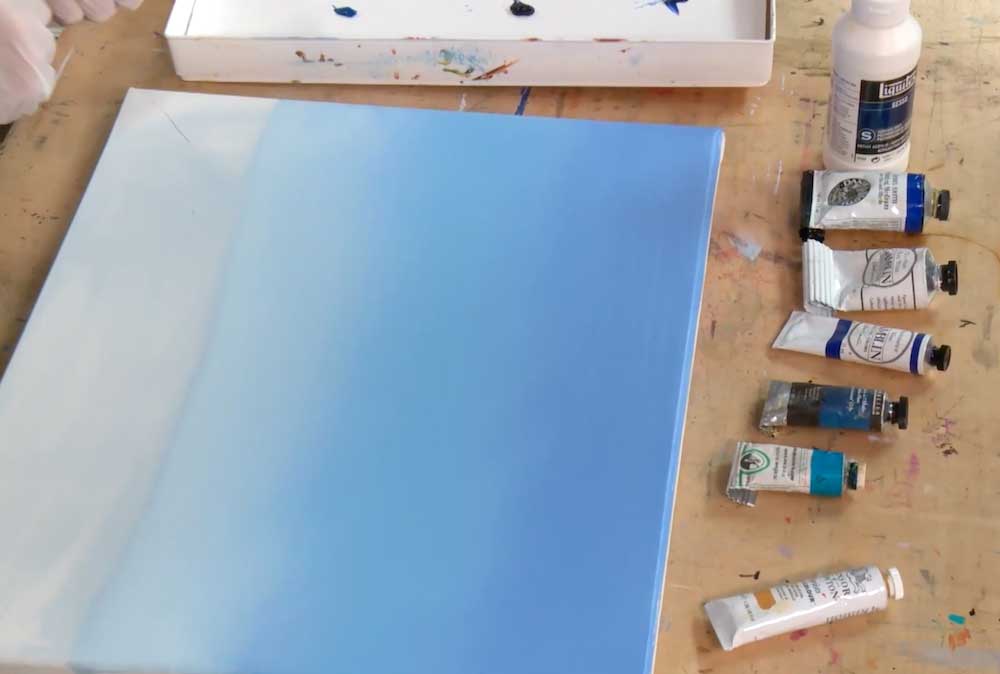
Before you start painting, make sure your canvas is primed and ready to go. You can use gesso to prime your canvas and create a smooth surface with a slight tooth for your paint to adhere to. Once your canvas is primed, create a wash of blue to serve as your sky. A blend of colors like phthalo blue, ultramarine blue, and manganese blue work well.
Step 2: Plan Your Composition
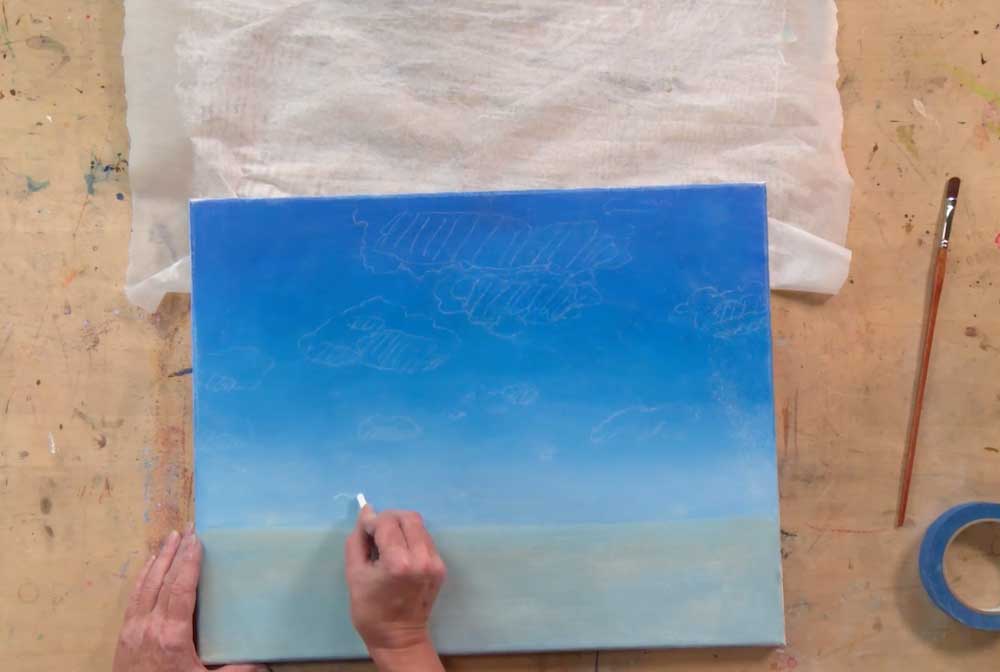
Decide where you want your clouds to be in the painting. Consider the overall composition and placement of other elements in your artwork. Clouds can serve as a backdrop or a focal point, so plan accordingly depending on where you want your viewer’s eye to be drawn. Using a piece of chalk or light-colored pastel to outline your cloud placement can be helpful.
Step 3: Mix Your Colors
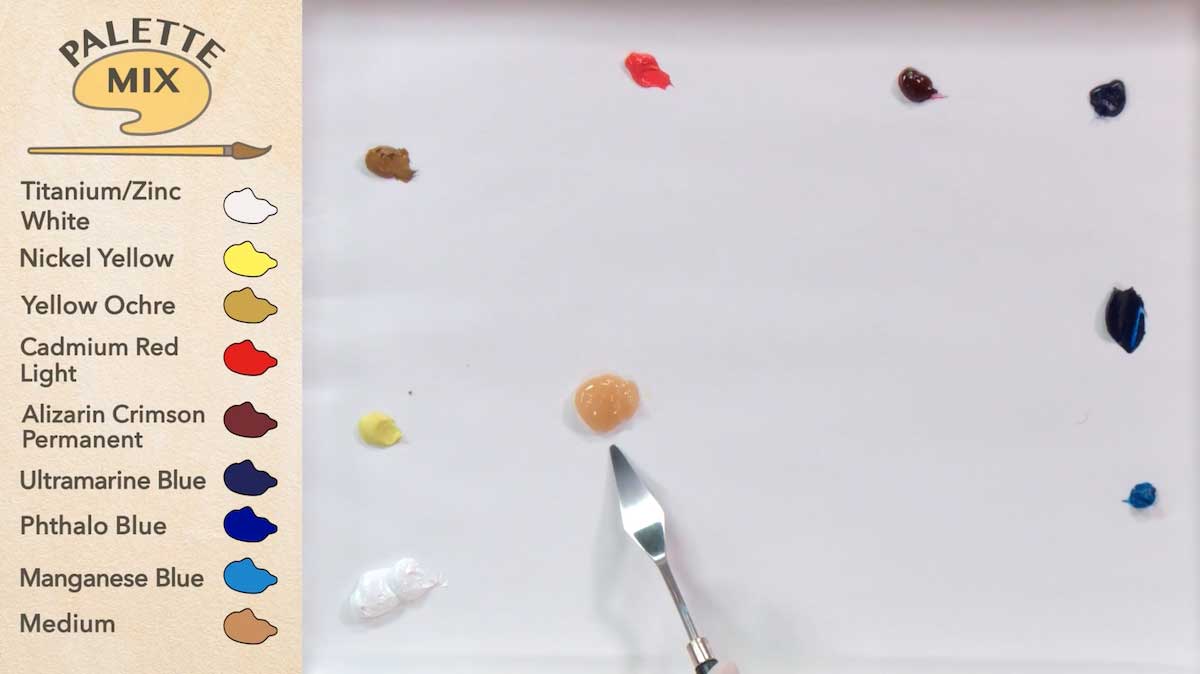
Start by mixing various shades of white, gray, and blue on your palette. Remember that clouds are not just white; they have subtle variations in color and tone. Experiment with different combinations to achieve a natural and realistic cloud color.
You may even incorporate colors like nickel yellow and yellow ochre for highlights, as well as cadmium red light and alizarin crimson permanent can to add warmth to your shadows. An oil medium can also help blend your colors and improve the consistency of your paints.
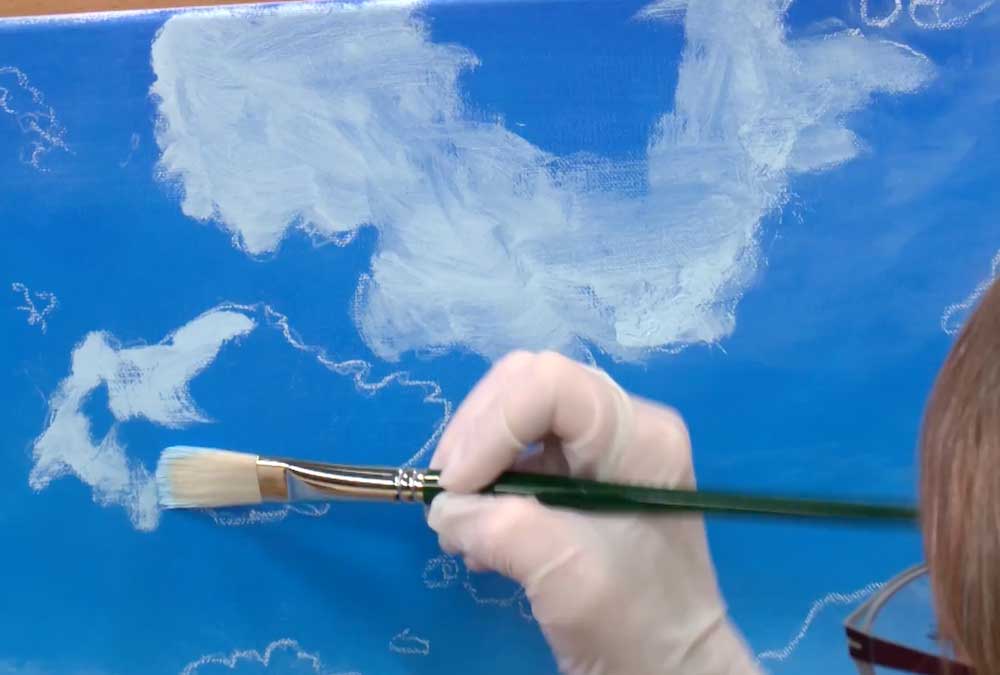
Step 4: Base Layer
Using a larger flat brush, apply a light wash of the base color onto the canvas where your clouds will be. This will serve as the underlying color of your clouds. Don't worry about getting it perfect; this is just the initial layer.
Step 5: Shape Your Clouds
Using a smaller round brush, begin shaping your clouds by adding more defined areas of lighter and darker tones. Be careful not to pick up too much paint with your brush, which can make your clouds appear solid and blocky. It’s much easier to add paint than it is to remove it from your canvas, so use a light hand and build up the shape gradually. Since clouds often have soft edges, use circular motions to blend the paint and create a natural, airy look.
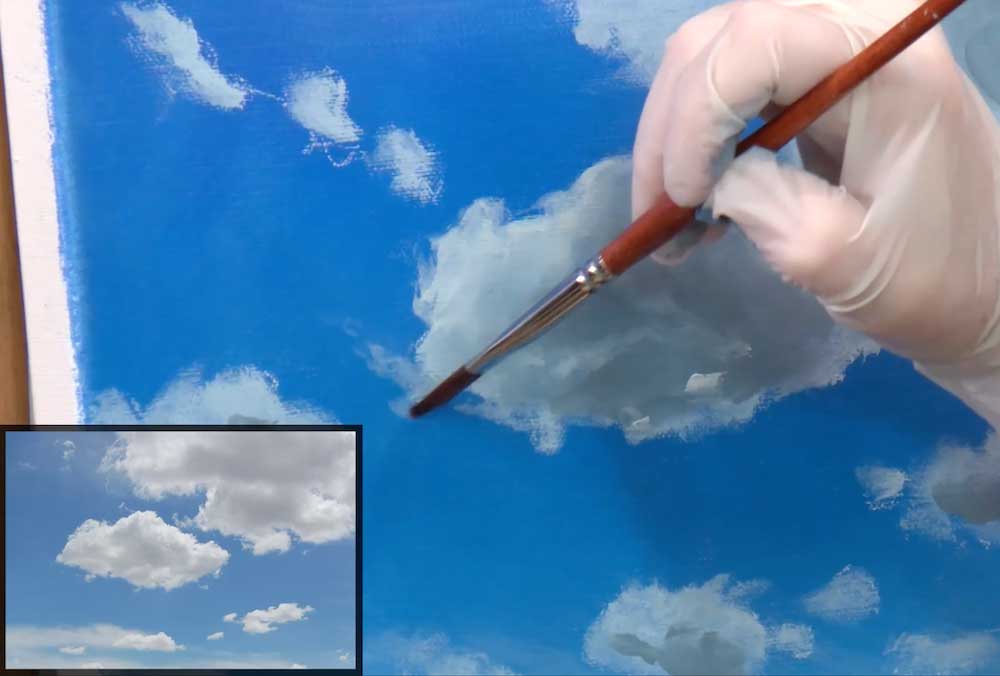
Step 6: Adding Highlights and Shadows
To add depth and dimension to your clouds, focus on adding highlights and shadows. Apply lighter colors on the parts of the clouds that are facing the light source, and darker colors on the areas in shadow. Blend the colors gently to avoid harsh lines.
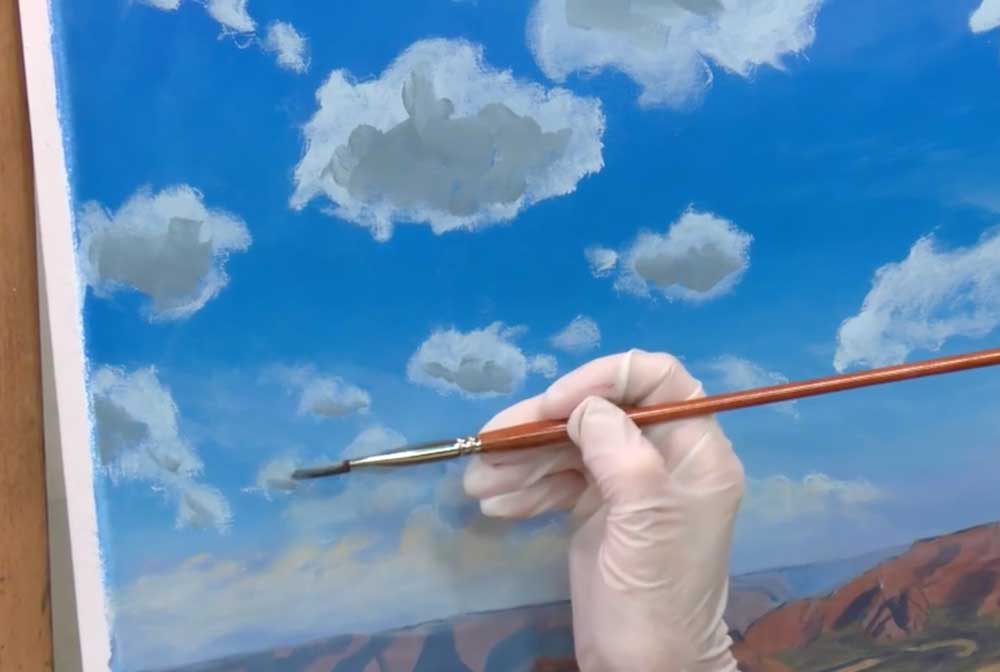
Step 7: Creating Texture
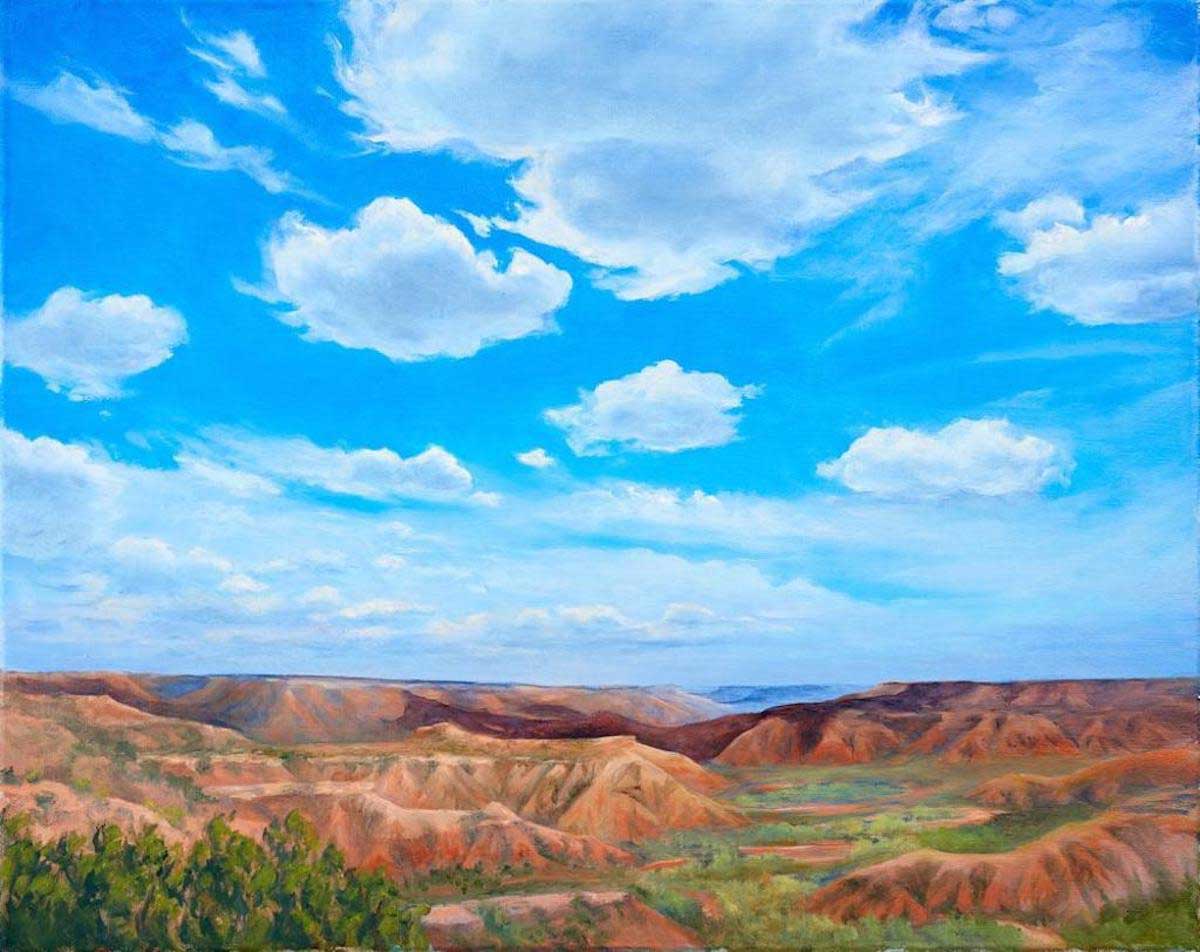
Clouds have lots of different textures, and you can recreate this by using various brush strokes. Use a stippling technique (dotting the brush on your canvas) to create the appearance of small cloud formations such as the ones in the background of this painting. You can also use a dry brushing technique to add wisps and details to the edges of your clouds.
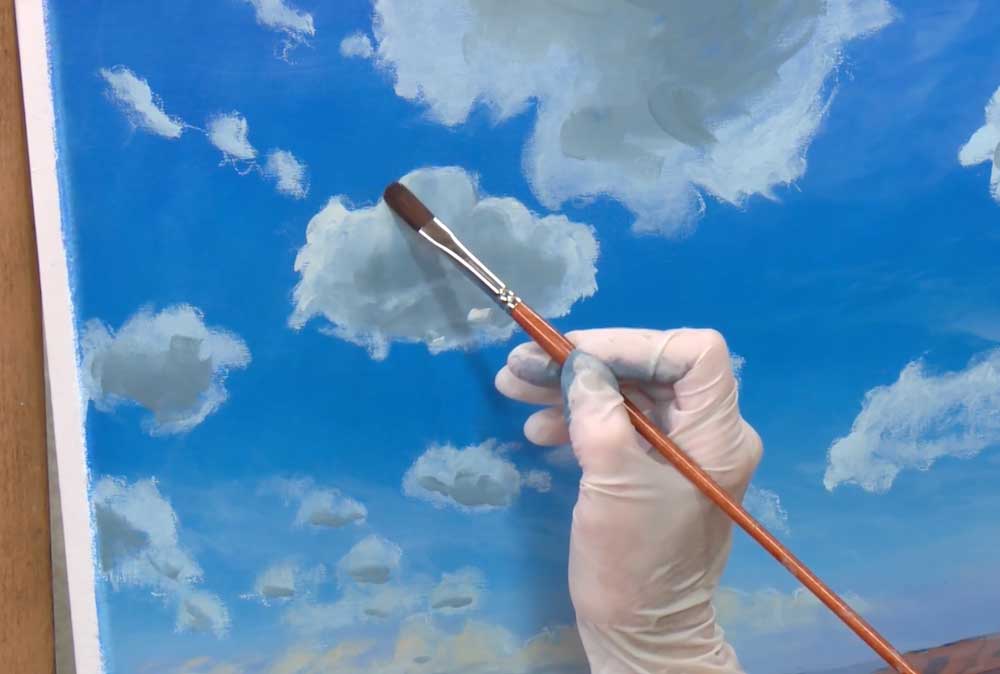
Step 8: Refining the Details
Step back and assess your cloud formations. Look for areas where light may be peeking through the clouds, as well as where your shadows fall, and add more layers of paint as needed to enhance the contrast between light and shadow. Pay attention to the overall shape and flow of the clouds, making sure they complement the rest of your painting.
Step 9: Final Touches
Once you're satisfied with your clouds, step back and look at your painting as a whole. Make any necessary adjustments to ensure that the clouds integrate seamlessly with the rest of the composition.
Step 10: Sealing Your Work
Once your painting is completely dry (which can take several weeks or months), you can seal your artwork with a clear varnish to protect your painting and give it a professional finish. To maintain the fine wisps and details of your clouds, consider using a spray varnish to preserve your painting.
Remember, practice makes perfect! Clouds come in endless shapes and sizes, so take your time to experiment with different techniques and styles. As you gain experience, you'll develop your own approach to capturing the beauty and essence of clouds in your oil paintings.

Great Information
Wonderful lesson. Thank you.
Thank you
So much new information, thank you so very much!
just to thank you so much